Complete interior kit compatible with Fiesta MK8-Puma MK2

Sale price €7495 EUR Regular price €8495
VARIANT

Description

Away with the chrome, in with your style. The complete Bcustom kit covers all the chrome details of your Fiesta MK8 or Puma MK2 cockpit, for a coordinated interior in the color of your choice.

What you get

  • 1 carbon headlight control surround
  • 1 carbon Sync3 surround
  • 4 air vent covers
  • 2 steering wheel strips
  • 1 gear shift surround
  • 3 pieces: passenger dashboard cover, Sync3 light strip, climate control light strip
  • 2 gel door strips

Variants

  • Without gel – in vinyl
  • With gel – glossy 3D finish

Compatibility

  • Ford Fiesta MK8
  • Ford Puma MK2

Good to know

  • Carbon badges are supplied in vinyl only, even with the gel variant.
  • The gear shift surround is supplied without gel in forged carbon colors.
  • Neon colors may have slight variations (e.g., red tends towards orange).

Application

Handle the pieces with care: they are easily moldable, do not pull them. Follow our installation guide.

Installation guide

BCUSTOM Design

Installation guide

Select your product and follow the steps in order. A few minutes, the right tools, and a bit of care for a professional-grade result.

01

Sun strips

These are applied wet, using soap and water: this allows you to slide the strip and center it perfectly.

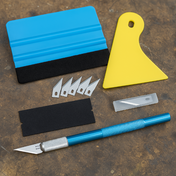
RequirementsAlcohol or waterSpray bottleMild soapSqueegee with feltUtility knifeHair dryer
Step 1 of 10

Clean the glass

Thoroughly clean the top part of the windshield with alcohol or plain water. Avoid glass cleaners: they leave a residue that prevents the vinyl from adhering.

Step 2 of 10

Prepare the solution

Fill the spray bottle with 90% water and 10% soap, then mix well.

Step 3 of 10

Wet the glass and vinyl

Spray the solution on the glass and the back of the vinyl. Don't be shy: the more you use, the easier it will be to position.

Step 4 of 10

Position and center

Gently place the vinyl on the glass and center it: as long as it's wet, you can slide it into place.

Step 5 of 10

Remove water and bubbles

Using the squeegee (preferably one with a felt edge), push out the water and air from the center outwards until the vinyl adheres completely.

Step 6 of 10

Heat the vinyl Hair dryer

Once the water is removed, heat the entire vinyl with the hair dryer.

Step 7 of 10

Trim the sides

Using the utility knife, cut off the excess material on both sides, following the edge of the glass.

Step 8 of 10

Trim the top

Cut the top edge, one half at a time.

Step 9 of 10

Heat again Hair dryer

Once the excess material is removed, heat the vinyl again, without overdoing it.

Step 10 of 10

Let it rest

Do not wash the car for at least 24 hours and do not use the windshield wipers. Leaving the car in the sun helps with adhesion.

Important
  • Do not wash the car for at least 24 hours and do not use the windshield wipers.
  • Do not install under direct sunlight.
  • After installation, leaving the car in the sun helps with adhesion.
02

Gel badges

The golden rule: heat the badge with a hair dryer before and after application. The heat softens the gel and activates the glue. Apply dry, without soap and water.

RequirementsAlcoholLint-free clothHair dryer
Step 1 of 6

Clean thoroughly

Degrease the surface with alcohol and let it dry completely.

Step 2 of 6

Heat the badge Before

Lightly heat the badge with the hair dryer: the gel will soften and adapt better to the surface.

Step 3 of 6

Expose the glue

Remove the white backing paper and lightly heat the glue as well, without touching it with your fingers.

Step 4 of 6

Apply and press

Position the badge and hold it pressed down for at least 30 seconds.

Step 5 of 6

Heat again After

Pass the hair dryer over the applied badge and press again, focusing on the edges.

Step 6 of 6

Let it rest

Do not touch or wash the badges for at least 24 hours after application.

The badge isn't sticking?

Almost always, the surface wasn't perfectly clean. Clean again with alcohol and reapply while heating the badge and glue well. If it's cold, work in a garage.

03

Pre-spaced stickers

They come with a transparent transfer tape that keeps letters and details in the correct spacing. They are applied dry.

Transparent transfertop
Stickercenter
Backing paperbottom
RequirementsAlcoholClean clothMasking tapeMeasuring tapeSqueegee
Step 1 of 8

Clean the surface

Degrease with alcohol and let it dry completely.

Step 2 of 8

Firm up the sticker

On a flat surface, run the squeegee over the entire transfer: this ensures the letters stick well to the transparent film.

Step 3 of 8

Create a hinge

Place the sticker down still with the backing paper, measure, and once it is straight and centered, apply a strip of masking tape vertically in the center.

Step 4 of 8

Apply the first half

Lift one half, remove the paper up to the tape, and cut the paper off. Smooth it down with the squeegee from the center outwards.

Step 5 of 8

Apply the second half

Remove the center tape, peel off the rest of the paper, and smooth it down in the same way.

Step 6 of 8

Press firmly

Run the squeegee over the entire sticker with firm pressure, especially on the edges and fine details.

Step 7 of 8

Remove the transfer Slowly

Starting from a corner, pull the transparent film back slowly, almost parallel to the surface (180°). If a letter lifts, lay it back down, squeegee it again, and try once more.

Step 8 of 8

Finish up

Press all parts of the sticker with your fingers. Do not wash the car for at least 24 hours.

Tips
  • Do not apply under direct sunlight or on hot surfaces.
  • On glass and flat surfaces, for large stickers, you can use soap and water: if you do, wait a few hours before removing the transfer tape.
04

Other stickers

Fog lights, rear fog lights, flat surfaces

If without transparent transfer tape, apply with soap and water.

Headlight eyelids

Dry application: the film needs to be pulled and heated to lay properly on the surface. You won't get an optimal result with soap and water.

Have doubts before starting?

Contact us: we are happy to help you achieve a perfect installation.

Contact us

These instructions are provided as a guide only. BCUSTOM accepts no responsibility for any application errors.

Production & shipping times

The production lead time is a MAXIMUM of 10 business days.

IMPORTANTE Alcuni loghi o disegni presenti in questo sito sono utilizzati esclusivamente a scopo pubblicitario e rappresentativo del prodotto. Eventuali loghi o disegni possono appartenere alle rispettive aziende proprietarie. La realizzazione e l’applicazione di tali adesivi devono avvenire nel rispetto dei diritti dei relativi proprietari. Prima di effettuare un acquisto, assicuratevi di disporre delle eventuali autorizzazioni necessarie per applicarli su autovetture, motocicli o altri supporti, anche in occasione di gare, eventi e fiere. Bcustom Design declina ogni responsabilità derivante da un utilizzo improprio o non autorizzato dei loghi o dei disegni; ogni responsabilità ricade sul cliente. Eventuali loghi e disegni presenti sul sito appartengono ai rispettivi proprietari, ai sensi dell’art. 21, comma 1, lettera c), del D.lgs. 10 febbraio 2005, n. 30, Codice della proprietà industriale. Il loro utilizzo sul sito ha esclusivamente finalità pubblicitarie e rappresentative. I proprietari di loghi o disegni che ne desiderino la rimozione possono contattarci tramite l’apposito modulo presente sul sito. Acquistando adesivi o gadget contenenti eventuali loghi, il cliente dichiara di essere in possesso delle autorizzazioni necessarie alla loro produzione e al loro utilizzo. Bcustom Design è esonerata da ogni responsabilità relativa a utilizzi impropri o non autorizzati.